
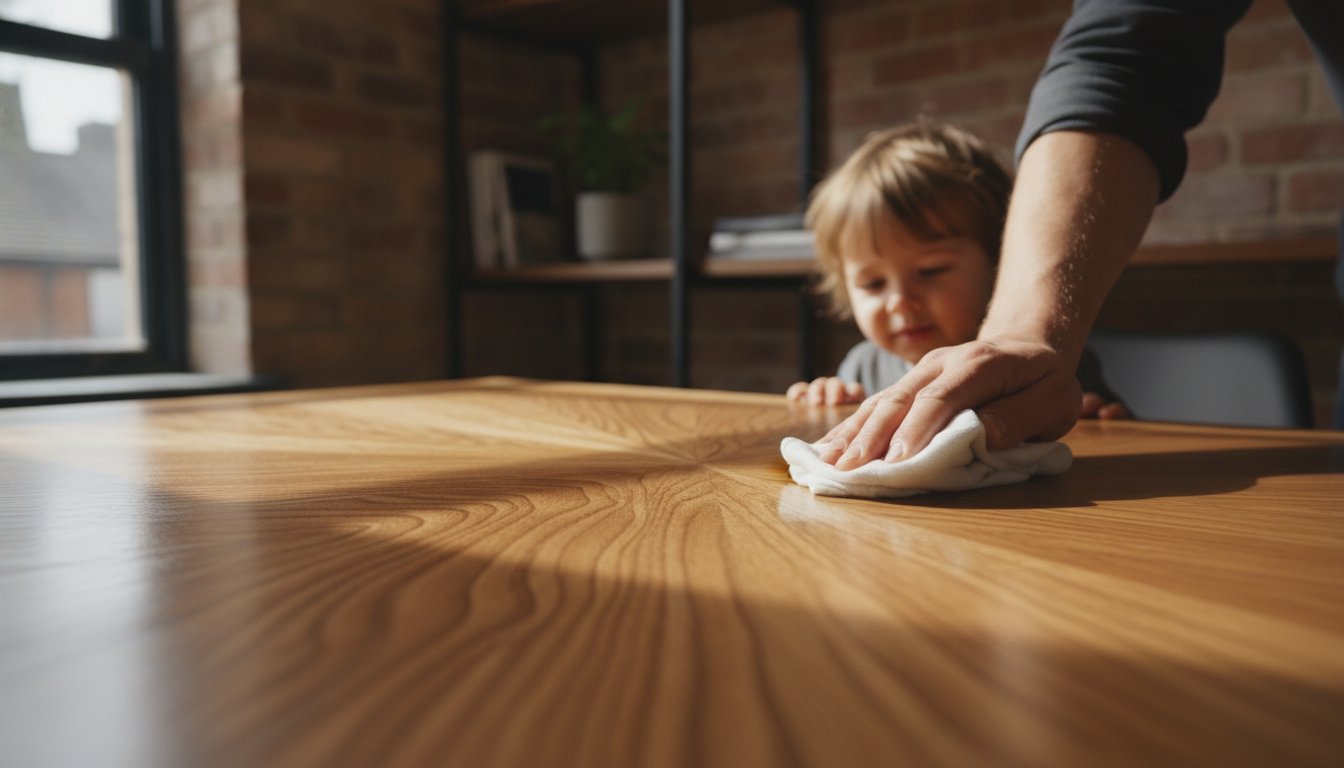
You spent weeks finding the perfect piece of solid European Oak, only to discover a jagged mark where a laptop edge or a stray pen caught the grain. It’s a frustrating moment that makes many of us feel like we’re failing to care for something truly special. We agree that a handcrafted desk is more than just a place to work. It’s a tactile connection to the natural world and a silent partner in your daily rituals. Learning how to protect a wooden desk from scratches shouldn’t feel like a chore or a source of anxiety.
We promise to reveal the professional secrets for preventing surface damage while showing you exactly how to fix deep gouges with confidence. This guide walks you through our workshop’s preferred oils and waxes, the benefits of leather protectors, and the simple rhythms of a lasting maintenance routine. You’ll learn how to treat your solid wood furniture as a living investment that grows more beautiful with the passage of time. By the end, you’ll have the skills to preserve your desk for yourself and the generations that follow.
Key Takeaways
- Learn why the density of European Oak or Black Walnut naturally resists damage and how understanding grain structure helps you prevent surface compression.
- Discover how to protect a wooden desk from scratches using breathable materials like leather or felt, avoiding the chemical risks associated with cheap plastic mats.
- Master the choice between tactile hardwax oils for easy home maintenance and polyurethane lacquers for maximum surface durability.
- Gain the confidence to use the ‘Steam Method’ to lift deep gouges, restoring the natural beauty of your solid timber without professional intervention.
- Understand the long-term value of handcrafted solid wood, which offers a lifetime of repairability that mass-produced alternatives simply cannot match.
The Science of Scratches: Why Solid Wood Needs Protection
Wood is resilient, but it isn’t invincible. To understand how to protect a wooden desk from scratches, we first need to look beneath the surface and examine how these marks actually form. A scratch isn’t just a visual imperfection; it’s a physical change in the wood’s structure. This happens when an object either shears through the protective layer of wood finishing or physically compresses the delicate cellular fibres of the timber itself. Every mark tells a story of impact, pressure, or friction.
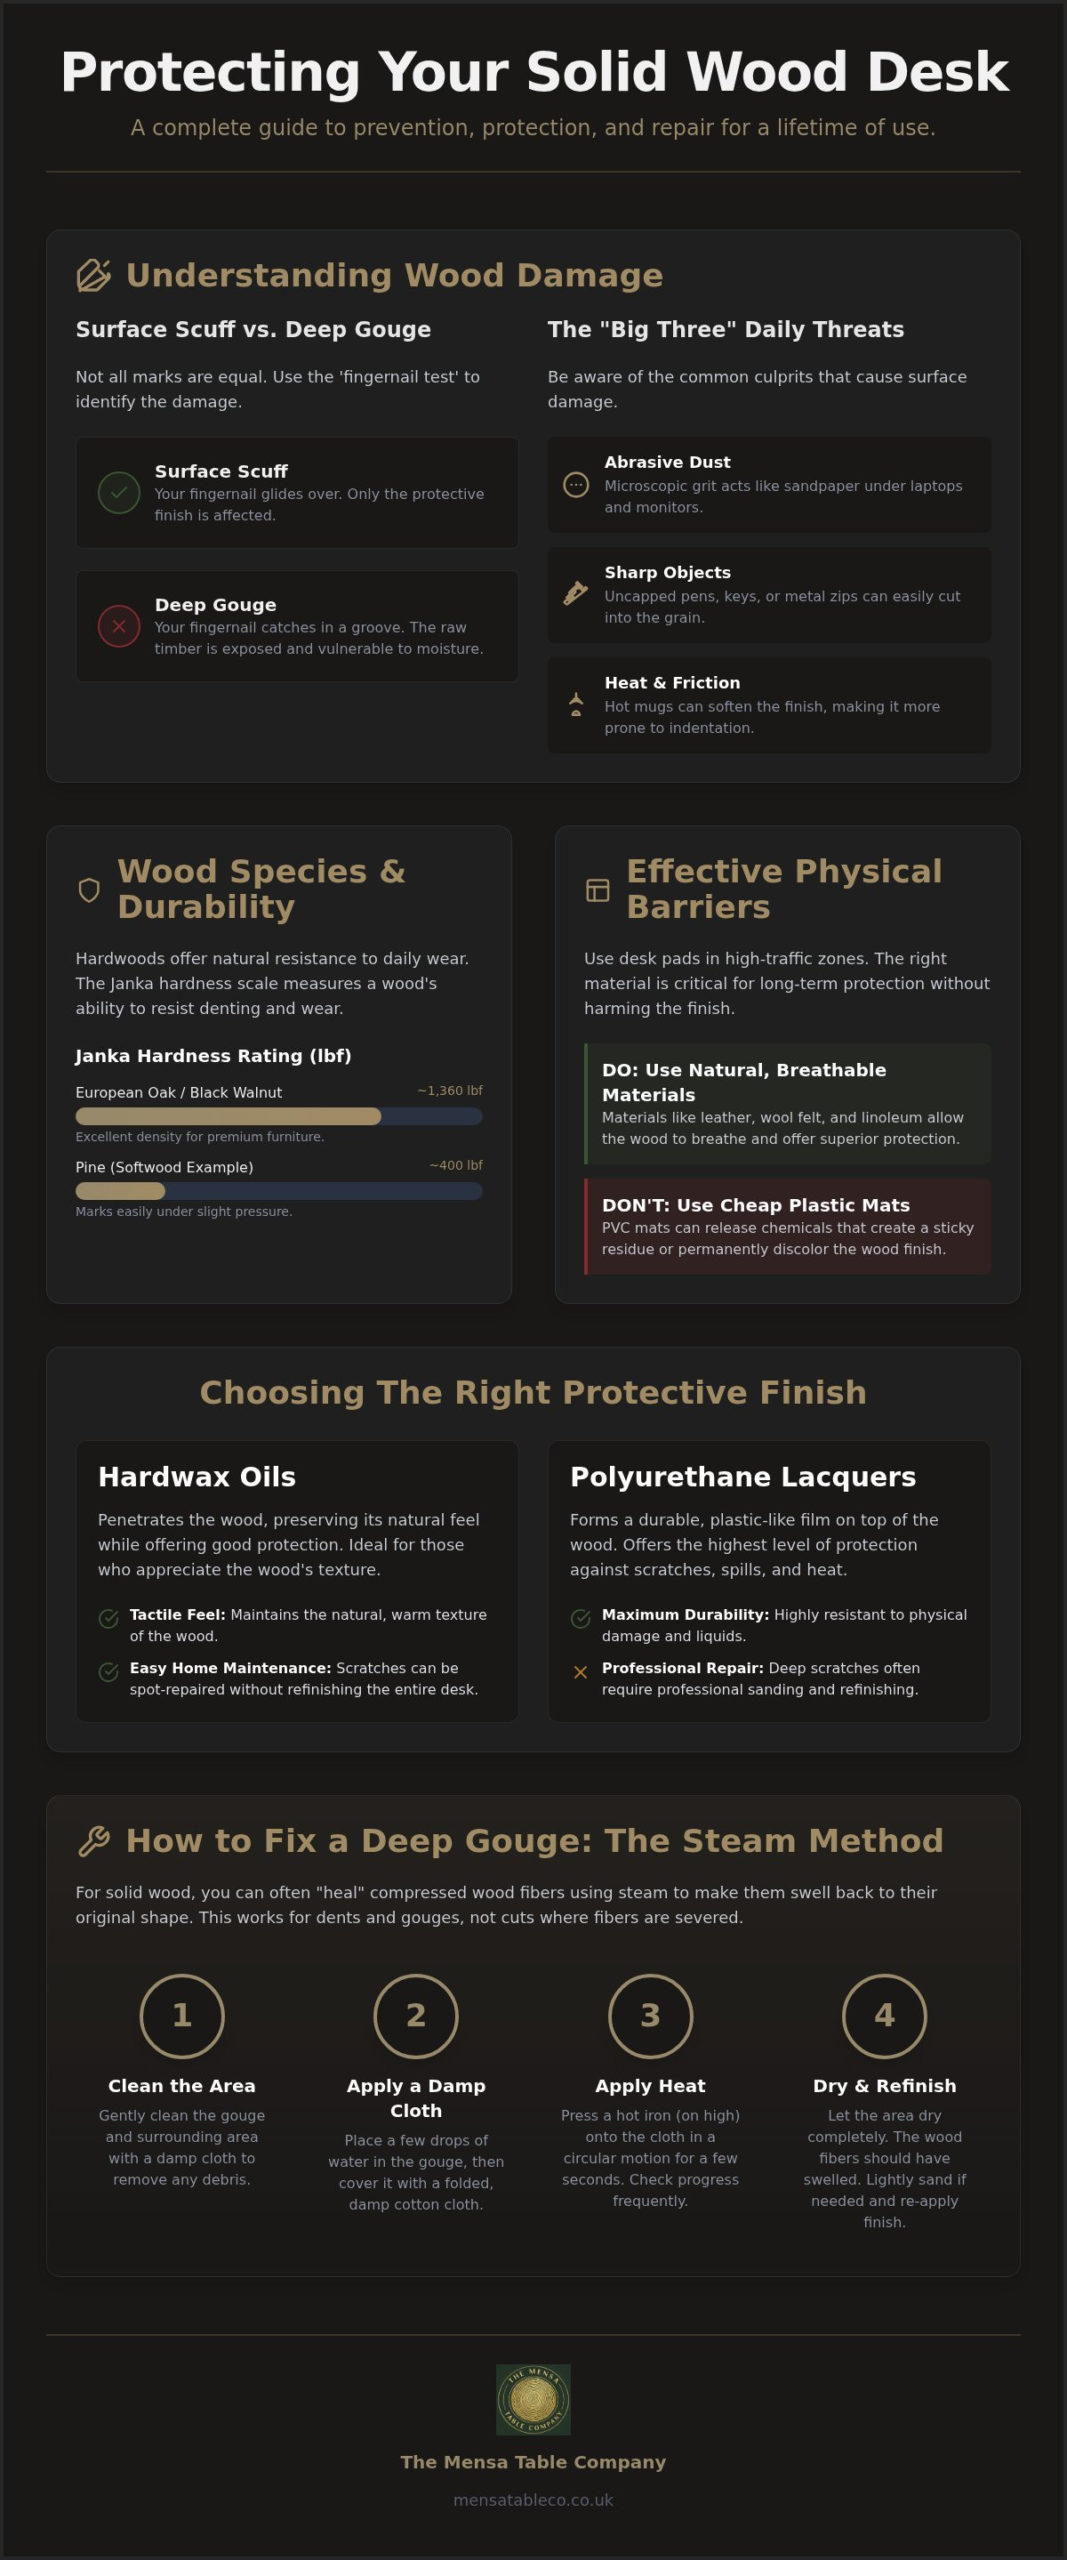
We identify the ‘Big Three’ culprits that threaten your desktop daily. Abrasive dust is the most deceptive. While it looks harmless, these tiny particles of grit act like microscopic sandpaper when trapped under the base of a laptop or a monitor stand. Sharp objects, such as metal zips on a sleeve or an uncapped pen, pose a more immediate threat to the grain. Finally, heat-induced friction from a hot ceramic mug can soften certain waxes or oils, making the surface momentarily more susceptible to indentation. A deep scratch is defined as a mark that penetrates through the protective finish and reaches the raw, unprotected timber beneath.
Surface Scuffs vs. Deep Gouges
Not all marks are equal, and identifying them is the first step toward care. You can perform a simple ‘fingernail test’ by gently running your nail across the mark. If it glides over without catching, it’s likely a surface scuff. We often view these as ‘character marks’ that exist only in the finish layer. However, if your nail drops into a distinct groove, you have a deep gouge. It’s vital to address these quickly. Leaving deep gouges exposed allows moisture from a damp glass or natural oils from your skin to seep into the raw grain, which can cause the wood to swell or discolour over time.
The Role of Wood Species in Durability
The species you choose dictates how much life your desk can handle. We handcraft our furniture using solid European oak and black walnut because of their impressive Janka hardness ratings. Oak sits at approximately 1,360 lbf on the hardness scale, providing a dense, protective barrier against daily wear. Tight-grained hardwoods offer a natural resistance that makes the quest of learning how to protect a wooden desk from scratches much easier than with softwoods like pine, which can mark under the slightest pressure. We encourage a psychological shift in how you view your furniture. Wood is a living material that breathes and evolves; while it’s incredibly durable, it deserves a level of respect that matches the decades it took to grow in the forest.
Physical Barriers: Using Desk Pads and Mats Effectively
Prevention is often the most elegant solution when considering how to protect a wooden desk from scratches. While we celebrate the tactile beauty of raw timber, high-traffic zones require a thoughtful layer of defence. A well-chosen desk pad creates a dedicated protection zone, shielding the surface from the constant friction of a mouse or the hard edges of a laptop. It’s about finding a balance where the barrier enhances the workspace rather than masking the natural grain you’ve invested in.
The choice of material is critical. We always recommend natural fibres like leather, wool felt, or linoleum over mass-produced plastic alternatives. Cheap PVC or plastic mats often contain volatile plasticisers that can migrate into the wood’s finish over time, causing a sticky residue or permanent discolouration. Natural materials breathe. They offer a soft, cushioned surface that absorbs impact while providing a sophisticated backdrop for your daily work. Don’t forget the humble coaster; a simple cork or felt base prevents both micro-scratches and the dreaded white heat rings caused by moisture trapped under a hot mug.
Choosing a Desk Pad That Complements Wood
Selecting the right size is a delicate art. You want to protect the ‘strike zone’ where your hands and devices rest most frequently, typically a 60cm to 80cm span. A non-slip backing is essential, but ensure it’s made of a stable material like natural rubber that won’t react with the finish. For those who own a solid black walnut desk, we find that grey or charcoal wool felt pads provide a stunning visual contrast while being exceptionally gentle on the dark, rich grain.
The ‘Clean Desk’ Ritual
Even the best pad can’t protect a desk if grit is trapped beneath it. Microscopic dust particles act like fine sandpaper; as you move your laptop or keyboard, these tiny stones grind into the finish. We suggest a daily habit of clearing the surface. When wiping down your desk, always move with the grain using a clean, dry microfibre cloth. Avoid circular motions, as these can create visible swirl marks in the light. A quick weekly inspection allows you to catch small marks before they deepen, ensuring your furniture remains a source of pride. If you’re unsure which protective accessories suit your specific timber species, you can always speak with our workshop team for tailored advice.
The Best Protective Finishes for Wooden Desks
The finish you choose serves as the silent guardian of your furniture. When considering how to protect a wooden desk from scratches, the chemistry of the top coat matters just as much as the timber species itself. Hardwax oils have become our gold standard in the workshop. They blend natural oils that penetrate deep into the fibres with hard waxes that sit on the surface, offering a resilient shield that still allows you to feel the organic, tactile texture of the grain. In contrast, polyurethane lacquers create a hard, plastic-like film. While this offers high spill resistance, it masks the wood’s soul and can make scratches appear more prominent as light reflects off the damaged plastic edge. Traditional natural waxes offer a beautiful high-lustre finish, yet they require more frequent attention to maintain their protective qualities.
Oil vs. Lacquer: The Great Debate
The fundamental difference lies in how these finishes age and respond to the environment. Oils are breathable and flexible, which is vital for handling the fluctuating humidity of the UK climate. Because they don’t form a brittle shell, they allow for simple ‘spot repairs’; you can sand and re-oil a small area without touching the rest of the desk. Lacquer is usually an all-or-nothing commitment. A single deep scratch often requires a full sand-back of the entire surface to achieve a seamless repair. We find that solid European ash particularly thrives with specific oil finishes, as the open grain drinks in the protection, highlighting its distinctive, athletic patterns.
How to Re-Apply Protection at Home
Maintenance is a ritual of respect. We recommend a simple re-oiling schedule every 12 to 18 months, depending on how heavily you use your workspace. You can perform the ‘water droplet test’ to check the integrity of your finish: place a single drop of water on the wood. If it beads up and sits on the surface, your shield is intact. If it begins to soak in and darken the timber, it’s time for a fresh coat. Safety remains our priority in the workshop and your home. Always dry oily rags flat outdoors or soak them in water before disposal to avoid the risk of spontaneous combustion. This small act of care ensures your desk remains a resilient, beautiful backdrop for your life’s work.
Step-by-Step Guide: How to Fix a Deep Scratch in Wood
Accidents are a natural part of a home’s history. Even when you’ve mastered how to protect a wooden desk from scratches, a heavy object or sharp tool can eventually leave its mark. The beauty of solid timber lies in its inherent repairability; unlike mass-produced alternatives, a deep gouge isn’t the end of the desk’s life. Before starting any repair, clean the area thoroughly with a damp cloth to remove any lingering dust or wax. You’ll need a range of sandpaper grits, typically starting at 120 for deeper marks and finishing with 240 to restore the smooth, tactile feel of the original surface. Always sand with the grain, as cross-grain movements create permanent scarring that is difficult to hide later.
The Steam Technique for Dents
If the wood fibres are compressed but not missing, heat can be your greatest ally. Place a damp, clean cotton cloth over the dent and press a warm iron onto the fabric for ten seconds at a time. This moisture turns to steam, penetrating the grain and causing the compressed fibres to swell back toward their original position. Be cautious not to overheat the area, as excessive temperature can cloud the surrounding finish or cause it to peel. It’s vital to remember that steaming only works on solid wood, not veneers where the heat would likely dissolve the underlying glue.
Filling and Refinishing Gouges
For deeper gouges where timber has actually been removed, you’ll need to fill the void to restore the level surface. We often mix fine sanding dust from the same species with a clear resin to create a perfect, organic colour match. If you’re using a pre-made wax filler stick, choose a shade slightly darker than the wood, because natural grain tends to deepen over time. Once the filler is set, sand the area gently until it sits flush with the surrounding timber.
The final step is to blend the repair into the original finish. Using a lint-free cloth, apply a thin layer of the hardwax oil or wax we discussed in previous sections. This seals the raw wood and restores the protective barrier that keeps your workspace resilient. If a mark feels too daunting to handle alone, or if you’re worried about matching a specific finish, you can always get in touch for professional advice from our workshop team. We believe every repair is an act of stewardship that extends the life of your furniture for the next generation.
Investing in Longevity: Why Quality Craftsmanship Matters
Choosing furniture is often a choice between the temporary and the timeless. While mass-produced flat-pack items offer a quick solution, they lack the structural integrity to survive a single house move or a significant surface impact. We believe in a different approach. The repairability of solid wood means that every mark can be addressed, and every surface can be renewed. A thick solid timber top is not just a workspace; it’s a generational asset that allows for decades of light sanding and refinishing without ever losing its soul or its strength.
Our philosophy at the workshop is simple. We build furniture that gains character rather than losing value. Even as you master how to protect a wooden desk from scratches, the underlying quality of the timber remains your best defence against the rigours of daily life. When you understand the care required for these materials, you aren’t just performing maintenance; you’re participating in the stewardship of a living material. A handcrafted desk becomes a site for human connection, witnessing the late-night projects and the quiet morning coffees that define our personal histories.
Solid Wood as a Generational Asset
Buying once and buying well is perhaps the most profound environmental choice a homeowner can make. By avoiding the cycle of disposability, you reduce the demand for low-quality materials and short-lived products that eventually clutter our landscapes. The natural variations found in our dining tables and desks are a deliberate feature. These unique grain patterns and knots help to naturally hide minor wear and tear, blending them into the story of the wood. There is a deep, quiet pride in owning a piece made right here in a UK workshop, where every joint is cut with intention and every surface is finished by hand.
Creating Your Perfect Workspace
Your office should be an extension of your creative self. We work closely with our clients to customise every detail, from the species of timber to the specific dimensions required for their unique workflow. Whether you are looking to match your desk with handcrafted benches or a coffee table for a breakout area, we ensure the same level of protection and care is applied across your entire collection. Ready to invest in a desk that lasts a lifetime? Get in touch with our craftsmen today to begin your journey toward a more intentional, enduring home.
A Legacy of Care for Your Workspace
Caring for solid wood is a ritual that pays dividends over decades. By choosing the right hardwax oils and embracing physical barriers like leather pads, you now have a complete strategy for how to protect a wooden desk from scratches. We’ve explored how the dense grain of European Oak and Black Walnut provides a natural defense; we’ve also seen how the art of the ‘steam method’ ensures that even deep marks don’t have to be permanent. These simple habits of maintenance transform a piece of furniture into a lasting companion.
Our furniture is handcrafted in the UK to serve as the heart of your home office for generations, not just years. Every piece we create is a commitment to quality and repairability. If you’re ready to move beyond the disposable and invest in a piece with a real story, we’re here to help. Design your bespoke, durable workspace with our expert team. Your desk is more than just a surface. It’s a partner in your daily work that deserves to be preserved and cherished.
Frequently Asked Questions
Can I use a magic eraser to get scratches out of my wooden desk?
No, you should avoid using magic erasers on handcrafted wood. These sponges are made of melamine foam, which acts like an ultra-fine sandpaper. Using one will likely strip away the protective hardwax oil or lacquer, leaving a dull, cloudy patch that stands out against the rest of your desktop. It’s always safer to use the dedicated sanding and re-oiling techniques we discussed to maintain the integrity of the finish.
Will a tablecloth protect my desk from deep scratches?
A tablecloth provides a soft barrier against surface scuffs and light spills, but it won’t stop a heavy or sharp object from denting the timber beneath. While useful for temporary tasks, a cloth hides the natural beauty of the grain. For a permanent workspace, we suggest using a leather or felt desk pad. These offer more substantial protection for high-traffic zones while allowing the rest of the wood to remain visible.
How often should I polish my wooden desk to keep it protected?
We recommend a light application of fresh oil or wax every 12 to 18 months to maintain a resilient shield. You don’t need to polish the surface weekly; a simple dust with a dry microfibre cloth is usually enough for daily care. If you notice the wood looks thirsty or fails the water droplet test, it’s a sign that the protective layer needs a gentle refresh to stay effective.
What is the best type of wood for a scratch-resistant desk?
Solid European Oak and Black Walnut are the premier choices for a durable, scratch-resistant workspace. These hardwoods have a high density that naturally resists compression from pens and equipment. While no wood is completely immune to damage, these species provide the best structural foundation for a desk meant to last a lifetime. Learning how to protect a wooden desk from scratches is much easier when starting with high-quality, tight-grained timber.
Can I fix a scratch in a wooden desk without sanding it?
Minor indentations can often be lifted using the steam method without any sanding at all. By applying heat and moisture, you encourage the compressed wood fibres to swell back to their original height. For deeper marks where the grain is actually broken, you might use a wax filler stick to bridge the gap. However, for a truly seamless and professional result, a light touch with fine-grit sandpaper is usually necessary.
Is it better to use wax or oil for protecting a home office desk?
Hardwax oil is our preferred choice for a modern home office. It penetrates the fibres like a traditional oil while leaving a hard, protective wax layer on the surface. This combination offers the best of both worlds: the tactile feel of natural wood and a durable barrier against daily wear. Traditional waxes look beautiful but often require more frequent re-application to provide the same level of protection against spills and friction.
How do I remove white heat marks and scratches at the same time?
White heat marks are moisture trapped in the finish, which can sometimes be drawn out with a low-heat iron and a dry cloth. If the heat has also caused the finish to crack or scratch, you’ll likely need to perform a spot repair. This involves gently sanding the affected area to remove the clouded finish and then re-applying a fresh coat of hardwax oil to blend the repair with the surrounding timber.
What should I do if I spill ink into a deep scratch?
Act quickly by blotting the ink with a clean, dry paper towel; don’t rub it, as this pushes the pigment deeper into the raw grain. Once the surface is dry, you’ll need to sand the scratch back until the stained fibres are removed. Because we work with solid timber, you can safely sand away the damage without worrying about hitting a thin veneer. Afterward, simply re-apply your protective finish to seal the wood.

Leave a Reply